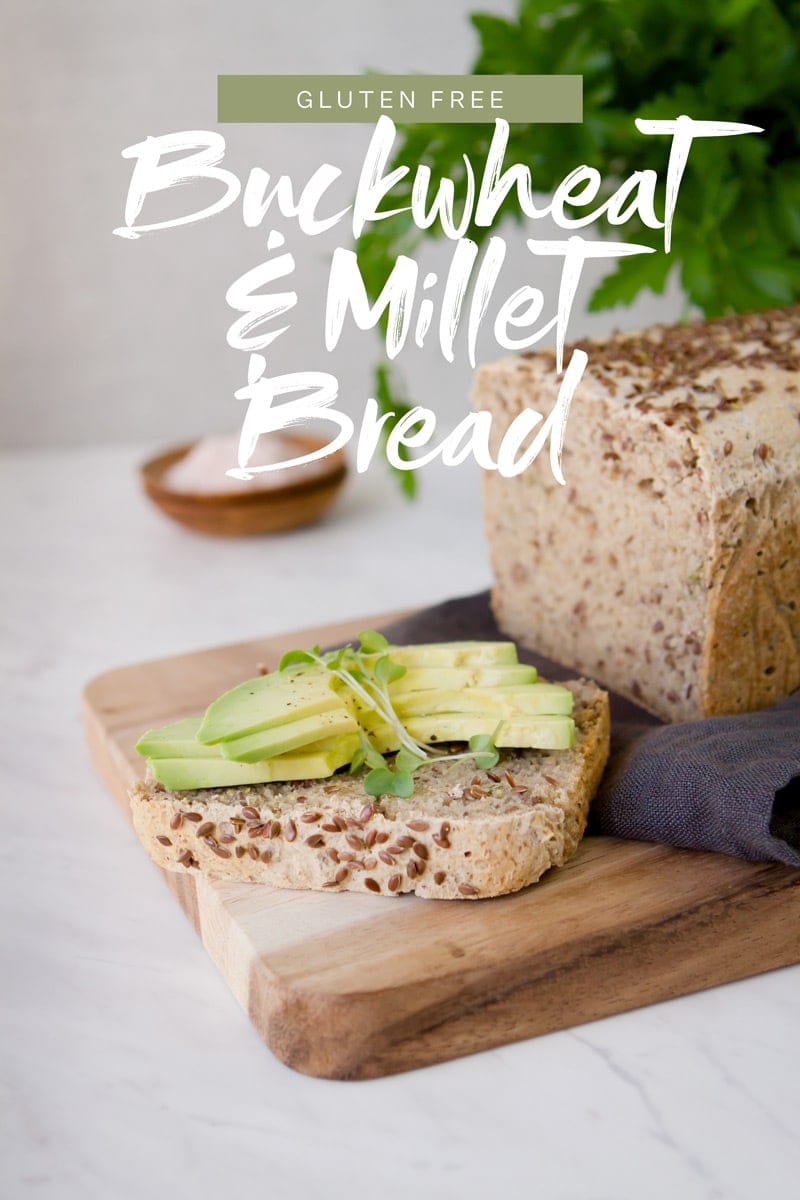
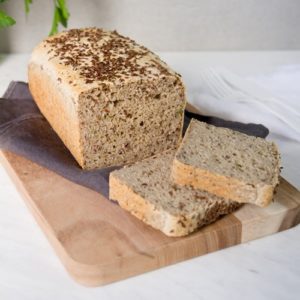
For those with sensitivities to gluten - this loaf is for you. A tried and tested and widely loved Gluten Free Buckwheat & Millet Bread. This comes out soft and spongy and keeps well in a bread bag on the kitchen bench.
Updated 17 July 2019.

Allergen-Friendly Buckwheat Millet Bread
Based on the number of people with gluten sensitivities I have seen so far in clinic, I thought it would be a great idea to create a classic gluten free loaf to recommend to clients making the transition to a gluten free diet.
Update: I've since also made a fabulous raisin bread - it's a must-try!
Firstly – there are so many neat ways you make a healthy bread – you can soak your grains first (great!), you can then go on to sprout them before bread making (as in Essene bread – also great!), or you can ferment your bread, sourdough style.
All these methods of preparation are fabulous as they help pre-digest the grains, neutralise anti-nutrients, and have the net result of making them that much more digestion-friendly.
The downside – time. Yep, I totally get it’s just too huge a leap to get straight into these more complex methods of preparation - especially when you have a hungry family. You want bread - you want it today!
So – where to start? With a delicious fuss free loaf made from store bought gluten free flours, using yeast to help it get a decent rise and provide enough aeration to make the end result soft and springy – and, well, comforting!
Because that’s why we eat bread, no?
[bctt tweet="Soft & spongy Gluten Free Buckwheat & Millet Bread, with flax and rosemary. Recipe here!"]

Making Buckwheat Millet Bread
This recipe uses a blend of two high protein gluten free flours: buckwheat and millet, in addition to tapioca starch, it works out roughly as two thirds high-protein GF flour to one third starch.
I’ve found this to be the sweet spot of gluten free baking. The high protein flours mimic gluten, while the starch improves the texture – helping add some ‘spring’.
Buckwheat and millet can be exchanged for other high protein gluten free flours if you want to mix it up a little.
In fact, I made a sweet version of this loaf using sorghum in place of millet – I think as long as you interchange the flours based on weight rather than cup measurements, you’ll be fine (eg, millet is quite dense and weighs more than the lighter, fluffier sorghum).
Tapioca is made from the root of the cassava plant. The brand I use (Ceres) is organic, and has not been chemically bleached.
You could use potato starch or green banana flour in place of tapioca – just be aware that both of these are a type of resistant starch that are fantastic for your gut but can make you prone to, erm, gas.

The yeast I used is an active yeast bought from my local organic store. I keep it in the fridge to keep it fresh. After many a bread-making-trial, I can add this gem: old yeast will not rise nearly as well as fresh. The yeast wakes up in the warm water and feeds off the sugar.
Once baked, it dies off and so is not active any longer.
The other great thing about this recipe – is its super allergy friendly – containing no dairy or eggs. I have a raging rosemary bush in the garden, so snipped a few decent sized tendrils and added a liberal amount of the fresh leaves to the mix.

Buckwheat Millet Bread Flavour Alternatives
This is a basic recipe, but some mad flavouring ideas to make it a bit more special are below:
- A teaspoon of turmeric powder for colour and anti-inflammatory compounds
- A couple of pinches of spirulina for the minerals if you don’t mind a green bread
- A few tablespoons of karengo fronds (New Zealand native nori), dulse flakes or a torn nori sheet – again for the minerals and a subtle salty-ness
- Hemp seeds for extra protein
- Slippery elm to help soothe the gut
- Fresh herbs – coriander, parsley, mint, basil
- Edible flowers – calendula, dandelion
You might also like to try my raw Ginkgo Pesto or Homemade Mustard recipes out - they'd make for great toppings.

Finally – once you’ve combined all ingredients in a bowl and mixed to form a dough (no kneading is required since there is no gluten), it takes an hour to rise in a warm environment and up to 40 minutes to bake.
I think this is such as great thing to make on a weekly basis – and it will certainly save you money.
Enjoy!
If you make and enjoy this recipe, please leave a rating below. And better yet – leave me a comment to tell me how you got on, or just say hi – I LOVE hearing from you. Follow me on Instagram, Facebook or Pinterest to see more of my everyday recipes and wellness tips.
If you’d like to chat with me about essential oils, or book in a class, you can do that here. If you’re after a Naturopathic consult, read more here.
📖Recipe
Gluten Free Buckwheat Millet Bread
Ingredients
- 1½ cups (approx. 225g) buckwheat flour
- ½ cup (approx. 100g) millet flour
- 1 cup (approx. 130g) tapioca starch
- 2 teaspoons baking powder source a gluten free brand
- ¼ cup whole flax seeds also known as linseeds
- ½ teaspoon sea salt fine
- 2 fresh rosemary sprigs
- 2 tablespoons extra virgin olive oil
- 2 tablespoons psyllium husks
- 2 cups warm water
- 2 teaspoons active yeast ensure it is fresh
- 2 teaspoons sugar to feed yeast
TO FINISH:
- Flax seeds
Instructions
- Line a rectangle bread tin with baking paper and set aside.
- Add sugar and yeast to ½ cup warm water, give a little stir, and set aside for ten or minutes until the yeast blooms and froths.
- Meanwhile, sift the buckwheat and millet flour, tapioca starch, baking powder and salt into a large mixing bowl. Add flax seeds. Tear the leaves from the rosemary sprigs and add those as well. Mix to combine.
- In a blender, whiz the remaining 1½ cups warm water with the psyllium husks for 10 seconds and no longer (otherwise the mixture will get too thick). Make a well in the centre of the dry ingredients, pour in psyllium husk mixture, olive oil and yeast mixture.
- Use a spatula to fold the mixture together in what I call a ‘batter-dough’ as it really is a mix of both!
- Pour 'batter-dough' into bread tin. Place a layer of cling wrap snuggly over the surface. Place bread tin in a warm spot and let rise for around an hour. This may take longer in colder weather. If room temperature is too cool, try my bread rising hack: warm a heat pack up and wrap in a towel, then sit bread tin on top. The trick is to keep a constant temperature – not too hot – otherwise the bread will rise too fast and collapse in the oven.
- After an hour, remove cling wrap and place bread tin in a hot oven. Bake (force fan) at 180˚C/356˚F for 35-40 minutes.
- Once cooked, remove from bread tin and let cool entirely before slicing with a serrated knife.
Notes
- This recipe uses a blend of 2/3 high protein gluten free flour to 1/3 starch, I think this is the sweet spot for baking a loaf like this. The high protein flours mimic gluten, while the starch helps improve the texture. Therefore, you could try substituting the buckwheat and millet for another high protein flour, like sorghum.
- Coconut flour will not work - it is far too dense, you won't get any rise.
- Choose an organic tapioca flour, as typically they are bleached.
- Potato starch is an alternative to tapioca, however, this can trigger people with IBS (gut bacteria LOVE to feed off potato starch!).
- I'm sorry but there are no alternatives to the psyllium husk - this is used as an alternative to eggs. One reader tried ground chia and reported the bread was gritty - chia are dark so they'll also discolour your bread.
- I've already made so many tweaks and substitutions to this recipe to make it allergy-friendly - there isn't much wriggle room for you to further faff with the recipe, otherwise I can't promise you'll get a good result!
- Your yeast must be FRESH. If it isn't, it won't bloom, and your bread won't rise.
- Coconut sugar can be used in place in regular sugar, however it will change the colour of your bread. I've tried both, and prefer white sugar - there is minimal in the final loaf as the yeast will consume most of it.
- The bread really needs a constant warm environment in order to rise, in cooler climates, try turning your oven on for a few minutes to heat it up, then turn it off, and place the bread on a rack in the centre, close the door and let it rise in there.
- Alternatively, try my hack: heat a wheat bag, wrap it in a towel, and rest the bread tin over the top.
- If the bread rises too quickly too soon (it will do this if the temperature is too warm), then it will flop.
- If you open the oven door while the bread is baking, it will flop.
- This bread is best stored wrapped snuggly in a breathable paper rather than plastic, and will stay soft on the counter for days (possibly longer - it always seems to get eaten so quickly!).


MACIEJ PIOTROWSKI
Hi there, I've tried this recipe few times but the bread doesn't come out airy or fluffy at all. It rises before baking and rises in the oven but it's still dense and solid like a brick. I have checked the ingredients many times and they are exactly like per your recipe. There is one thing I am puzzled about the consistency of the dough. Mine is definitely hard solid like a marzipan, I can make a log with it and it not liquid in any way. You are suggesting pouring the batter-dough. Mine is definitely not pourable. Any suggestions? Perhaps my flours soak up more water?
My question: what consistency should I achieve before putting in into the tin? How liquid or how solid? Shout it keep its form, mouldable or fluid like?
Many thanks for your recipe - I love the taste, just want it to be less solid and dense