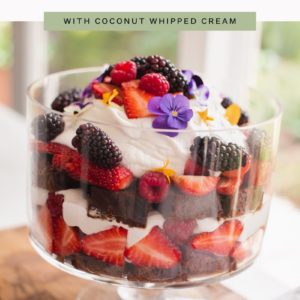
I don’t think there’s anything more summery than a vibrant berry trifle – this recipe is easy to make, with gluten free and vegan friendly ingredients.

The garden has welcomed summer in finally. Jasmine scented air. Fruit on the blueberry bush. Borage absolutely out of control – bees in a frenzy enjoying the purple star-flowers. Sunny calendula in bloom. Passionflower unfolding as the day breaks. Everything looks vibrant and celebratory just in time for Christmas.
Today I have for you a summer berry trifle recipe, packed with all my favourite flavours: chocolate, espresso, three different kinds of berries, and coconut.
As always, it’s entirely plant-based – though you honestly wouldn’t think it with a spoonful in your mouth. It’s soft, creamy, textured, sweet – you miss out on nothing flavour-wise despite the adaptations.
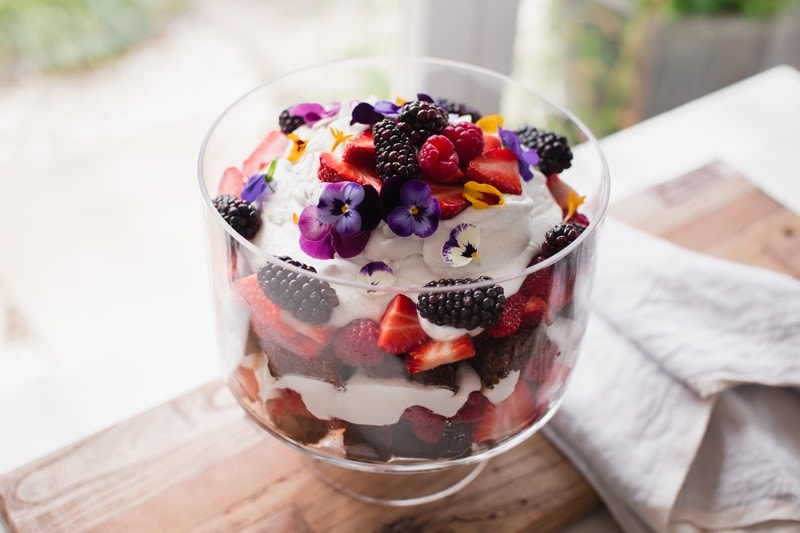
This is the perfect dessert to serve at a summer party – visually stunning with those messy layers and pops of colours.
[bctt tweet="Chocolate Berry Trifle - this wonderful, messy, layered dessert just happens to be GF and vegan friendly." username="laurenglucina"]

What is a trifle?
A trifle is a layered English dessert (and Kiwi / Aussie fave), that usually comprises of the following ingredients:
- Alcohol-soaked sponge cake
- Custard
- Fruit
- Whipped cream
Other common additions include jelly, jam, stewed or macerated fruits. Strawberry trifle is probably the most classic flavour, but others include chocolate, brownie, tiramisu and peach.
Trifles are often served at Christmas, and are a yummy, lighter alternative to the far more dense Christmas fruit cakes.
Chocolate Berry Trifle, my way
I’ve given this a plant-based make over, of course! I’ve also skipped the alcohol and gluten. Here are the substitutions I made:
- Homemade gluten free vegan chocolate cake in place of the sponge cake. Sponge cake is made with eggs, white sugar and white flour. Yes it’s more time consuming to make your own cake, but at least it’s a healthier option.
- Espresso and maple syrup in place of alcohol. Whatever cake you’re using – it’s traditionally soaked in alcohol (like sherry) to moisten it up.
- Whipped coconut cream in place of regular cream. Yes, it’s higher in saturated fat – but this is a special occasion dish – and, making it dairy free means it’s friendlier to those with lactose intolerance.
- Plain fresh berries in place of macerated berries or berry jam. Honestly – fresh berries in season are Mama Nature’s candy – they just don’t need any extra refined sugar added to them.
How to Make this Chocolate Berry Trifle Recipe
The day before – place your tins of coconut cream in the fridge to harden.
Now, we need to decide, are you going to make your cake from scratch, buy one ready made, or use a cake mix? Up to you – there are some great gluten free / vegan cake mixes on the shelves, but it’s still a little harder to come by ready-made cakes. I’m going to assume you’re making from scratch.
So to begin, sift all your dry cake ingredients into a bowl, then transfer to a food processor (you can do this in a cake mixer too). Add all wet ingredients, including soaked dates, and pulse until uniform in texture. Pour into a prepared cake tin and bake at 180˚C (360˚F) for up to 40 minutes, or until a skewer comes out clean.
Let the cake cool, then transfer to a plate or shallow dish. Pierce the cake all over with a fork. Brew a strong cup of coffee, and sweeten it by adding pure maple syrup. You can make the coffee stove top if you prefer, and add coconut sugar, to thicken into a sugar-syrup.
Pour the coffee mixture over the cake, slowly, allowing it to soak in. If there is any liquid that hasn’t been soaked up – drain it off. If the cake looks like it could take a bit more – add a tablespoon at a time.
Cut the cake into small cubes ready for assembly.

To prepare the coconut cream, open the tins and drain out the liquid. Scoop the hardened cream into a bowl. Add sugar of your choice – I’ve gone with erythritol (a sugar alternative), and vanilla extract. Whip using a stand mixer for 5-10 minutes until completely smooth.

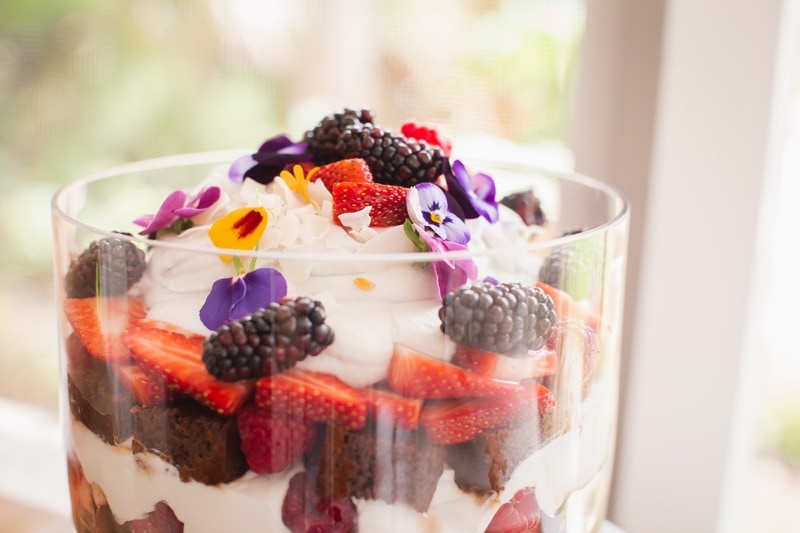
Finally prepare your berries – I’ve used a mixture of strawberries, raspberries and blackberries. Wash them and allow to dry thoroughly. If using strawberries, slice them first.
That’s it – now we assemble!

First a layer of espresso-soaked chocolate cake. Then a generous layer of berries. Followed by whipped coconut cream. And repeat.
To make your berry trifle super pretty – add a few pansies and calendula petals.

Secrets to whipping the perfect coconut cream
There are a few tricks I’ve learnt here;
- Seek out full fat tinned coconut cream with NO emulsifiers or thickeners. Why? Because these ingredients help reduce separation, and we actually want to separate the thinner liquid from the creamy fat.
- It’s helpful to put your coconut cream in the fridge upside down – so that when you open the can, the liquid is on top and can be drained easily.
- You need at least two can’s worth in the stand mixer at one time (this recipe uses four), otherwise, there isn’t enough volume to whip it real good.
- Sugar rather than liquid sweetener is preferable.
- The whipping time needs to be upwards of five minutes for the smoothest result.
Easy!
Your questions answered
Can I make this berry trifle ahead of time, and can I refrigerate it? Yes – but remember, coconut cream is a form of saturated fat, so it will turn solid in the fridge. If you’re making this the night before, you’ll need to bring it out with ample time to soften the cream. My preference is to be organised and make it the day you will be serving it. You can however make the cake the day before – just keep in an airtight container on the kitchen bench.
What can I use in place of the espresso? Try a strong brew of chai tea, with pure maple syrup or coconut sugar to sweeten. But please don’t omit this addition – trifles are meant to be soft and moist in texture.
Can I add a layer of jelly? Yes! Try it as the first layer. To make vegan jelly, user agar agar flakes in place of gelatin. I don’t have a recipe for a plain jelly, but I do have this delicious berry and coconut mousse recipe which would give you a similar effect.
Can I add custard? Of course. For a vegan option – try a cashew whipped cream. Personally – I think the coconut is all you need.
Ok lovers – enjoy! See you next week, L. x
If you make and enjoy this recipe, please leave a rating below. And better yet – leave me a comment to tell me how you got on, or just say hi – I LOVE hearing from you. Follow me on Instagram, Facebook or Pinterest to see more of my everyday recipes and wellness tips.
If you’d like to chat with me about essential oils, or book in a class, you can do that here. If you’re after a Naturopathic consult, read more here.
📖Recipe
Chocolate Berry Trifle
Equipment
- Food processor
- Cake stand mixer
- 7 1/2 inch cake tin
- Trifle bowl
Ingredients
Chocolate Cake:
- 1 cup buckwheat flour
- 1 cup almond meal
- 2 teaspoons baking powder gluten free brand
- 1/2 teaspoon baking soda
- 1/2 teaspoon coarse sea salt
- 6 tablespoons raw cacao powder
- 1 1/2 tablespoons psyllium husks
- 1/2 heaped cup Medjool dates, pitted about 100g
- 1/3 cup olive oil
- 1 1/2 cups coconut milk full fat, from tin
- 1/2 cup pure maple syrup
- 1 tablespoon vanilla extract
Espresso Syrup:
- 1 teaspoon instant coffee
- 1/2 cup boiling water
- 2 tablespoons pure maple syrup
Whipped Coconut Cream:
- 4x 400g cans full fat coconut cream, with no emulsifiers or thickeners chilled in fridge overnight
- 1/4 cup sugar - I used erythritol
- 1 tablespoon vanilla extract
- Couple of pinches fine sea salt
Berries:
- 3 punnets strawberries 750g total
- 1 punnet raspberries 125g
- 1/2 punnet blackberries 65g
Instructions
Chocolate Cake:
- Soak dates in hot water for 15 minutes, then drain and set aside.
- Preheat oven at 180˚C / 360˚F. Line cake tin with baking paper and grease sides with olive oil.
- Sift all dry ingredients into a bowl, then transfer to food processor.
- Add all liquid ingredients including the dates, pulse till just combined - don't over-pulse or mixture will thicken too much due to psyllium husks. Pour into prepared cake tin and bake for up to 40 minutes or until a skewer comes out clean.
- Once cooked, let cake cool, then transfer to a shallow dish. Prick holes with a fork all over the surface ready for the espresso syrup.
Espresso Syrup:
- Combine all ingredients, pour slowly over the cake until all is absorbed, then cut the cake into small cubes/slices ready for assembly.
Whipped Coconut Cream:
- Open up all four tins of coconut cream and pour out the liquid. Scoop the hardened cream into a bowl, and add sugar, vanilla, sea salt. Whip using a stand mixer for 5-10 minutes until completely smooth.
Berries:
- Wash, let dry, slice strawberries.
Trifle assembly:
- In a trifle bowl, add a layer of cake, followed by a generous layer of berries, followed by half the coconut whipped cream, then repeat.
- To decorate, add extra berries and fresh flower petals.
- Best made on the day you want to serve, preferably having not been in the fridge (will harden the coconut cream).
Notes
- Use a store-bought cake or make one up from the packet to save on time, otherwise, bake the cake the day before
- Seek out full fat tinned coconut cream with NO emulsifiers or thickeners. Why? Because these ingredients help reduce separation, and we actually want to separate the thinner liquid from the creamy fat.
- It’s helpful to put your coconut cream in the fridge upside down – so that when you open the can, the liquid is on top and can be drained easily.
- You need at least two can’s worth in the stand mixer at one time (this recipe uses four), otherwise, there isn’t enough volume to whip it real good.
- Sugar rather than liquid sweetener is preferable.
- The whipping time needs to be upwards of five minutes for the smoothest result.
- A strong cup of chai is an alternative to the coffee.
- Don't pour too much coffee over the cake - you want enough for it to be moist, but not enough so that once assembled you get a layer of liquid down the bottom.
- Best served within a few hours of making - if you refrigerate - the coconut whipped cream will harden (don't recommend).
- Nutrition panel is a rough estimate only folks.

Ask me anything