
The last few weeks I’ve been soaking and sprouting like a mad thing – chickpeas for the Healthy Baked Falafel recipe and more recently, buckwheat for the Raw Vegan Kofta. I’ve been enjoying the fruits of my labours immensely because, having a very sensitive gut, these typically hard to digest grains and legumes have given me no trouble at all.
Today’s recipe is a healthy sprouted Vegan Black Bean Burger. Black beans are protein and fibre rich, but as I just mentioned, hard for those with sensitive tummies to actually enjoy in any appreciable amount.
By just going back to traditional food preparation methods, soaking and sprouting, we are able to make them soo much friendlier on the gut. But something quite special occurs during these processes. Beans (and other legumes, nuts, seeds and grains) are indeed nutritious whole foods. However, they contain a group of natural plant compounds called antinutrients, that quite significantly interfere with the absorption of minerals in the diet. This is because they have the undesirable effect of binding with said minerals, meaning they pass right through the digestive tract undigested, without being absorbed.
In soaking, and then sprouting, many of these antinutrients are able to be released – allowing us access to the minerals they were once bound to.
An additional benefit – sprouting actually increases the nutrient content of whatever it is you're sprouting.
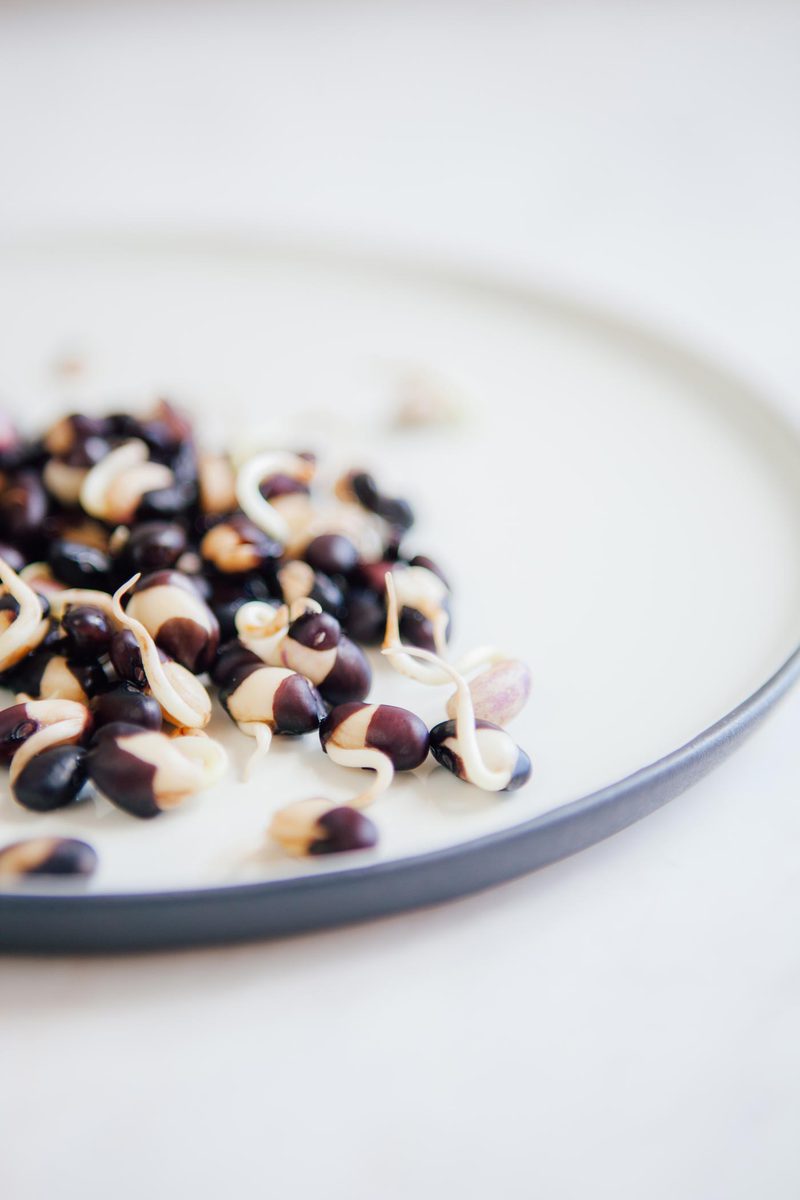
Soaking and sprouting is actually a very simple process. However – of all the things I have sprouted, black beans are the most tricky. Even after looking out for them really well (what a good sprout Mama!), I noticed there were quite a few that didn’t sprout at all.
Many people over-complicate things when it comes to soaking and sprouting, with charts and diagrams for optimal soak and sprout times. Pff. I’m just going to simplify things for you – a good timeframe to soak your beans/nuts/seeds/grains is anywhere between 8 and 24 hours. I find that legumes tend to need the longer end of the spectrum.
[bctt tweet="Soak and sprout your beans/grains/nuts/seeds to make them friendlier on the gut. Find out here."]
How to soak anything
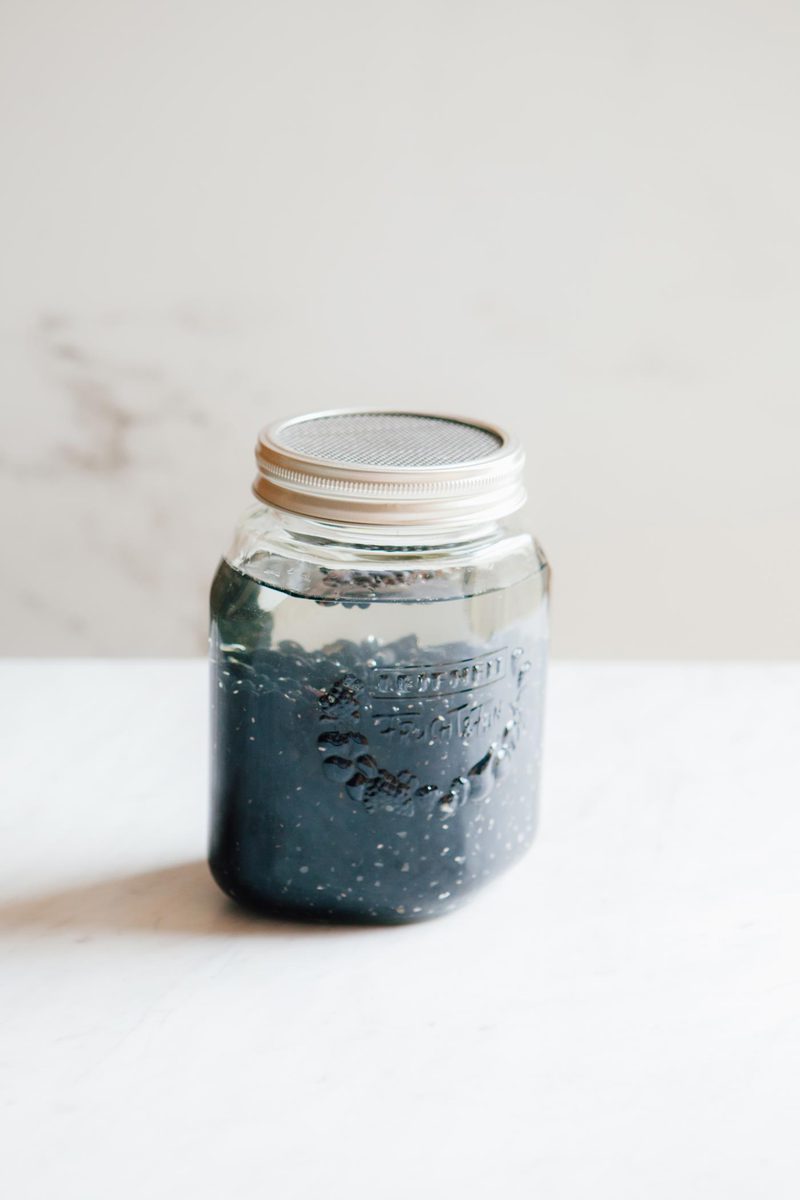
- Put your nuts/seeds/grains/legumes in a sieve, and rinse them well under running water. Pick out any wierd looking bits and discard.
- Pop them in large bowl, and cover with water – use a lot, as you’ll find they double in size.
- Add a splash of apple cider vinegar or lemon juice – aka an acid medium. This facilitates the process of neutralising the antinutrients.
- Cover with a paper towel and leave out of direct sun for 8-24 hours.
- Drain and rinse well. All done.
How to sprout anything
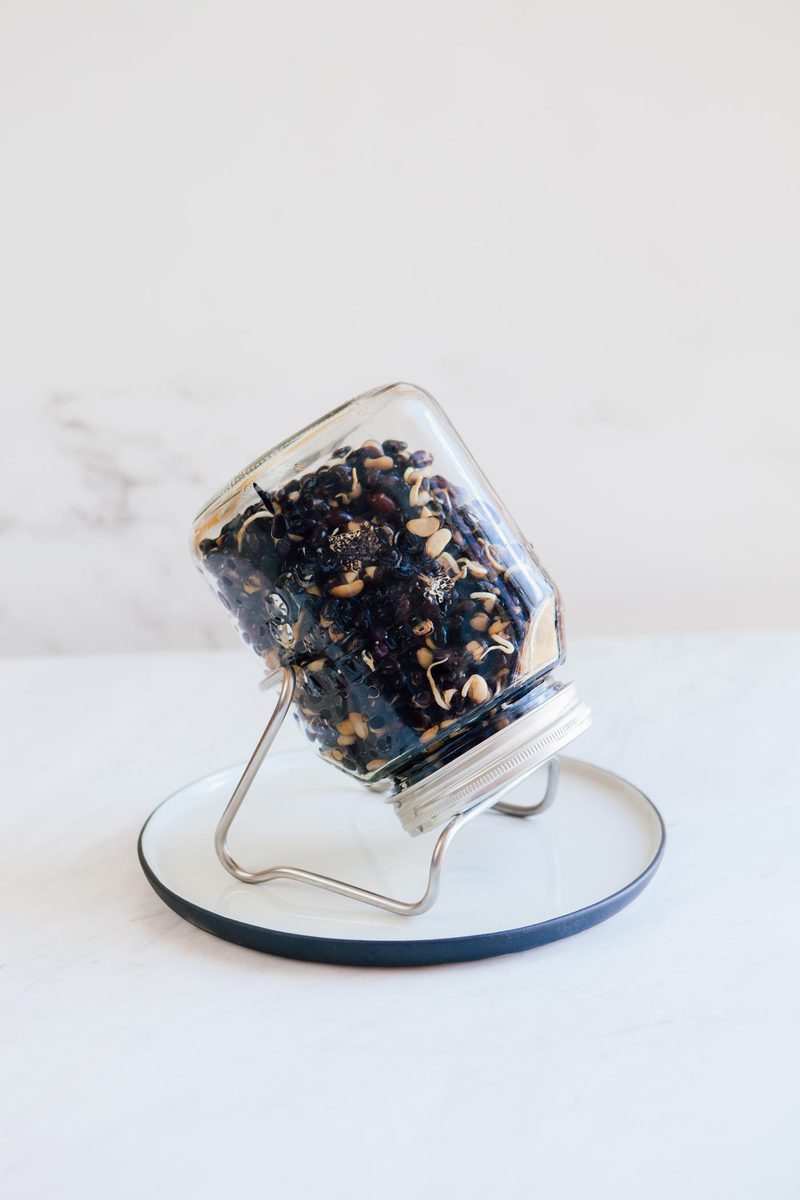
- Place your soaked and rinsed nuts/seeds/grains/legumes in a large glass jar (or in a fine mesh bag, or use proper sprouting trays). Tip – use a big jar – the sprouts will grow and need space to expand.
- Cover the mouth with a mesh lid or with cheesecloth fastened with a rubber band.
- Rest the jar on an angle (see my pics below) so excess water can drain, and leave it somewhere out of the sun.
- Rinse and drain the contents of the jar 2-3 times a day, for 2-3 days, or until little sprouts grow. I find quinoa and buckwheat sprout very quickly, while black beans needed three full days. In terms of yield, as a general rule of thumb, they’ll double in size (so 1 cup would yield 2 cups sprouted).
- Once done, rinse one last time, and store in the fridge till you’re ready to use.
One last note on soaking and sprouting
Canned beans will not sprout! You must use dried beans, preferably organic.
Another word on canning
Legumes and vegetables are commonly sold ready-to-eat in cans, which is convenient of course, but comes at a price. Metal tins are lined with a substance that typically contains bisphenol A (BPA). BPA is an estrogen-like petrochemcial and a potential endocrine (hormone) disruptor. It is used to toughen up plastics and resins. It is unfortunately quite unstable and readily leaches into any food or liquid it comes in contact with.
In animal studies it has been shown to have a raft of harmful effects, reproductive problems, diminished intellectual capacity, asthma, obesity and diabetes among them [1]. So remember, choose safety over convenience and look to source and purchase fresh produce, or dried organic beans as in the case of this recipe. It is so worth the effort of soaking (and sprouting if you are so incline), then cooking from scratch to ensure your meal is free from industrial petrochemicals.
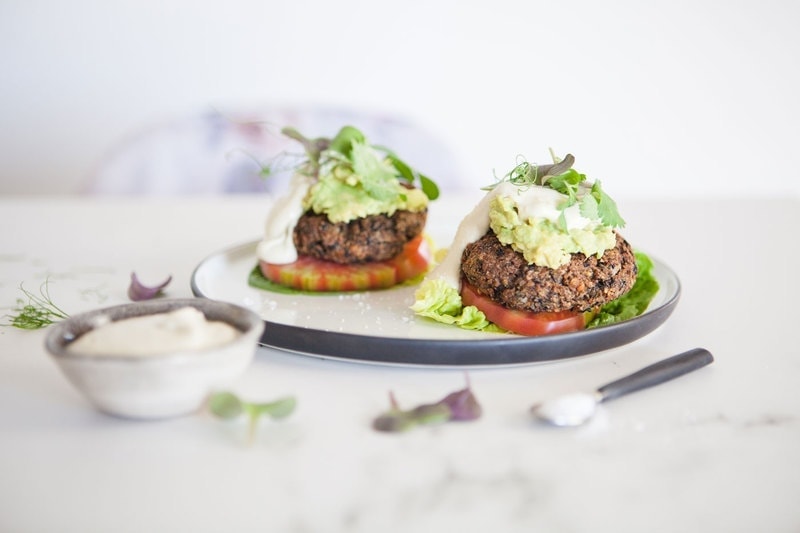
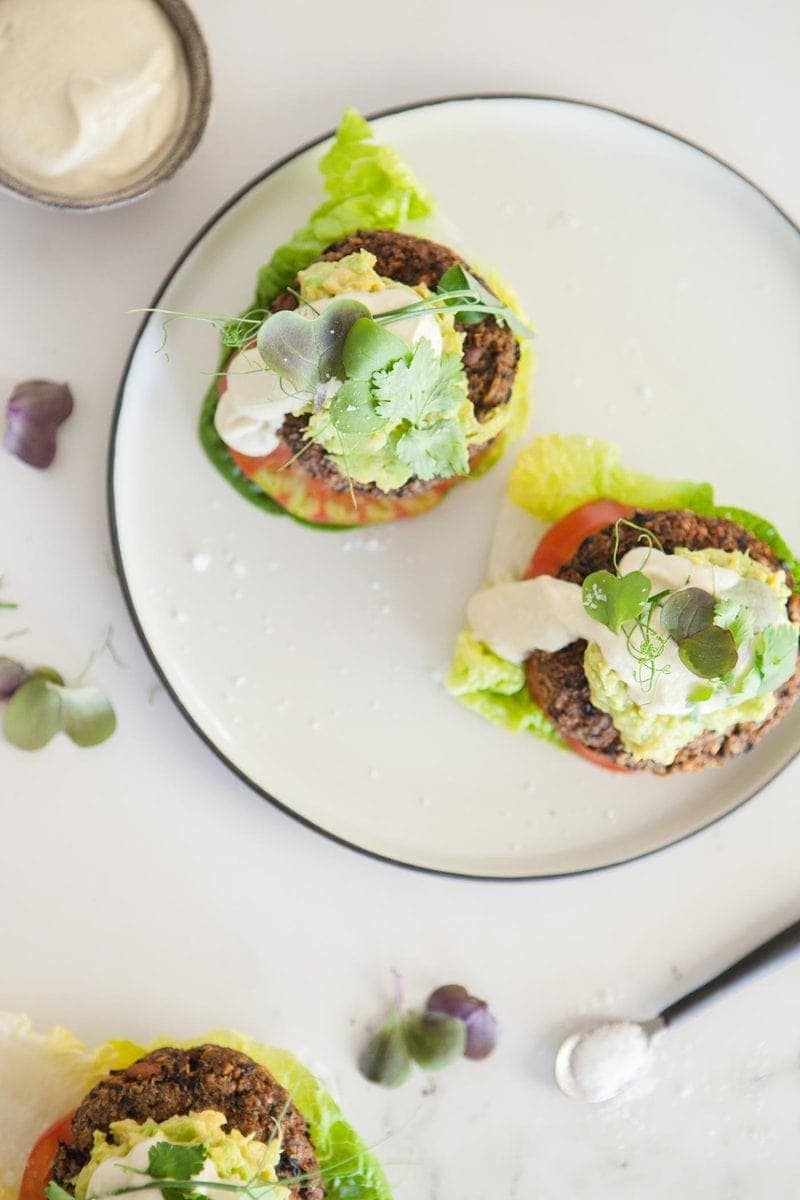
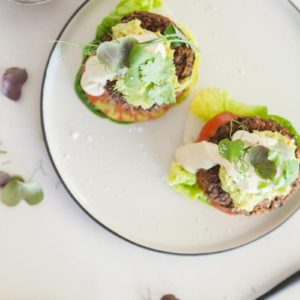
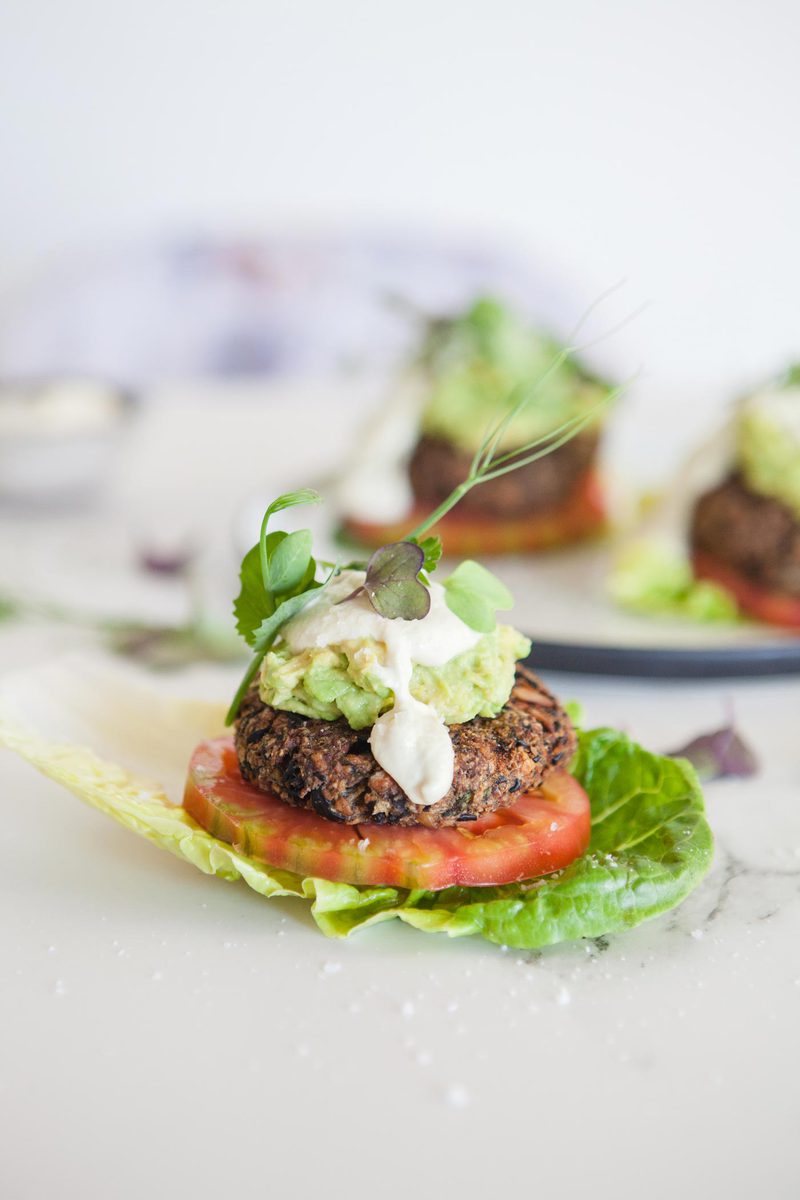
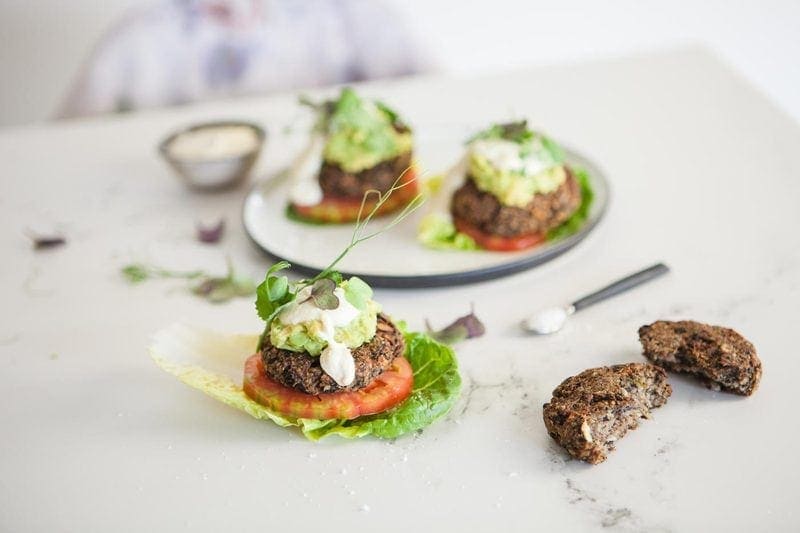
Vegan Black Bean Burgers
Ok, so now we know how amazing it is to cook from scratch and sprout along the way. This recipe is incredibly easy to make. Flavoured with mushrooms, garlic, lemon and thyme, they’re quite delicious. They are nice and crunchy on the outside, and a little moist on the inside. I decided to steam the sprouted beans for a few minutes before I made the burger patties. I think this is what made the texture so soft, as I skipped this part in making my Healthy Baked Falafel recipe – and the recipe was far crunchier.
I don’t think you really need buns. My partner was satisfied with how I prepared them. I used baby Cos lettuce leaves as the base, then stacked slices of acid free tomatoes, the burger patty, smashed avocado (by the way – add a sprinkle of spirulina for a superfood hit here), and lots of raw garlic aioli.
If you’re serving these for friends, get some microgreens from the Farmer’s Market – they look fab sprinkled over the top.
This is another recipe that tastes great the next day, so they’re good lunch box fillers.
Have fun!
L.
Reference:
1. Environmental Working Group. 2016. Pollution in minority newborns: BPA and other cord blood pollutants. Retrieved from: http://www.ewg.org/research/minority-cord-blood-report/bpa-and-other-cord-blood-pollutants
📖Recipe

Vegan Black Bean Burger Patties
Ingredients
- 2½ cups sprouted black beans (see method in post above)
- ½ cup water
- ¼ cup flaxseeds
- 1 cup Portobello mushrooms chopped
- ½ packed cup fresh coriander
- ¾ cup gluten free breadcrumbs
- 1 onion white, chopped
- Zest of 1 lemon
- 2 cloves garlic
- Leaves from a good handful of fresh thyme
- ½ teaspoon coarse sea salt
Serving suggestions:
- Avocado
- Baby Cos lettuce
- Acid free tomatoes
- Garlic aioli see recipe below
- Microgreens
Instructions
- Pre-heat the oven at 180˚C.
- Steam the sprouted black beans for just 5 minutes, to soften a wee bit.
- In a spice grinder, grind the flaxseeds to a meal (you could also use store-bought flax meal).
- Add all ingredients (except ingredients to serve) to a food processor and blend well. Stop and scrape the sides down as you go.
- Transfer to a large mixing bowl and shape the mixture into small balls, flattening them into patties in your hands. Wet your fingers under running water in between patties to make for an easier job.
- Place patties on an oven tray lined with baking paper. Fan bake at 180˚C till done – flipping the burgers half way. You might want to turn up the heat for the last 10-15 mins to crisp the outer. My oven is a bit old and rusty - they took 40 minutes – you may find yours cook a little sooner. They’re done when the outer is brown and a little crunchy, and the inside is still a little soft to touch. Slightly smaller patties rather than 12 large ones would cook a bit easier. I went with 12.
- To serve, stack the patties on a baby Cos lettuce leaf, with sliced acid free tomatoes and smashed avocado. Top with garlic aioli (recipe below) and sprinkle a few microgreens/sprouts/left over coriander to dress.
- Store leftovers in the fridge or freezer.
Nutrition
📖Recipe
Raw Garlic Aioli
Ingredients
- ½ cup cashews
- 5 tablespoons water
- Juice of half a lemon
- 1 teaspoon apple cider vinegar
- 1 teaspoon garlic powder
- 1 teaspoon onion powder
- 2 teaspoons nutritional yeast
- 2 big pinches coarse sea salt
Instructions
- Soak the cashews in ample water for a few hours (2-5 hours), then drain and rinse.
- Add cashews and all other ingredients (including those 5 tablespoons of water) to a blender, whiz till creamy.
- Serve with the Sprouted Black Bean Burgers.
Nutrition
I'd love you to follow me on Instagram,
tag me @ascensionkitchen so I can see your creations!


Ask me anything